Have you ever wanted to have a simple, fully self hosted way to receive payments from customers or supporters? Maybe you have a crowdfunding project or want to accept donations for your personal project. Well with BTCPay Server you can run everything from your own Point of Sale system for a bricks and mortar store all the way up to an online store front with full integration into e-commerce giants like Shopify or WooCommerce.
Contents
What Is BTCPay Server?
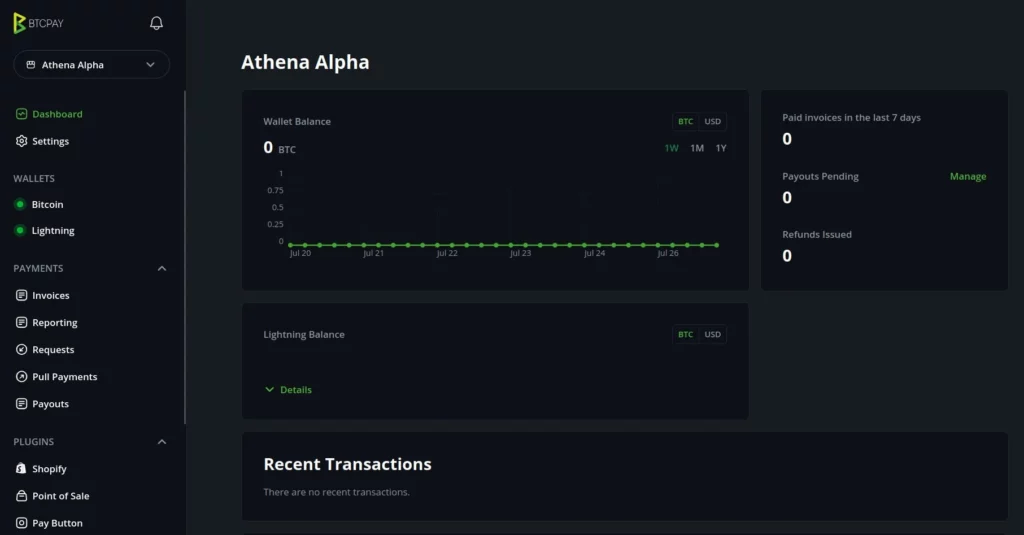
BTCPay Server is a completely Free and Open Source Software (FOSS) Bitcoin payment gateway system (think like Visa or Stripe) that was started by Nicolas Dorier back in 2017. It allows any person or business to freely self host their own payment processor and accept bitcoin payments as well as lightning payments. Nicolas started BTCPay Server after the below famous Tweet.
This is lies, my trust in you is broken, I will make you obsolete
Nicolas Dorier
At the time, the easiest and best way for businesses to accept payments using Bitcoin was to sign up to various centralized third parties such as BitPay or blockcypher. Given Bitcoin was explicitely created by Satoshi Nakamoto to get rid of trusted third parties, it was vital for there to also be a payment processor software layer that could be used without third parties as well.
Why Should You Use BTCPay Server?
But why should you or your business care? Why not just use Stripe or Shopify or even BitPay? Well the main reasons to use BTCPay Server are for self soverignty, no KYC, full control and zero fees. By being your own payment processor, there are no centralized third parties in between you and your customer.
You can accept bitcoin payments directly, peer-to-peer just how it was intended from the first Genisis Block. This means that you or your business can never be banned, de-platformed or cut off from your customers (and vital incomee) like so many other big tech companies will do these days for reasons they never say.
As you’re the literal bank and payment processor, you also don’t have to pay anyone else fees for each transaction. You obviously still have to pay the Bitcoin Transaction Fees, but this can also be side stepped by using the Lightning Network.
Beyond these core benefits, using BTCPay Server also has many other benefits:
- No KYC required for you or your customers
- Complete control over your funds with instant settlement (no waiting weeks or months)
- Enhanced privacy and security for you and your customers
- Full support for payments over Tor for even more privacy
- Easily support a crowdfunding campaign, point of sale app or simple payment buttons
- Full customization of the invoice look and feel
- Full support for virtually any currency
- No ongoing platform fees
What Can BTCPay Server Be Used For?
With a Full Bitcoin Node and BTCPay Server, you are not just your own bank, but your own payment processor too. You can send and receive bitcoin as well as generate invoices for customers to pay you all entirely peer-to-peer and entirely hosted and controlled by you with your own free, open source hardware and software.

A huge multi billion dollar bank with big, old granite buildings at the heart of Wall street? Obsolete. Internationally spanning credit card systems, EFTPOS terminals and proprietary online systems and API’s? Obsolete. We cannot overstate how powerful a Bitcoin Node + BTCPay Server stack is here! It’s just like how WordPress now makes any giant News conglomerate obsolete.
Now any private individual, business, merchant, charity, non-profit, developer, local community or other entity can join the Bitcoin Network and receive bitcoin donations or payments for their products. No more third parties and for a cost that’s basically a rounding error!
Some of the top use cases for BTCPay Server include:
- Merchants who sell products and services either online or at a bricks and mortar shop
- Charities or non-profit organizations who want to accept donations in a privacy preserving way
- Individuals who self fund their dream project or who wish to run a crowdfunding campaign
- Developers who want to receive donations or ongoing support from the community
Choosing Your Deployment Method
To begin using BTCPay Server you first need to decide how you’re goint to deploy it as there are a number of ways you can get BTCPay Server up and running for you or your business. To run the software it’s recommended to do so using their provided Docker image. From here you have two main choices:
- You host the Docker image (more technical, no trusted third parties)
- A trusted third party hosts the Docker image for you (less technical)
If you wish to be fully self sovereign and host the Docker image yourself, you can do so using your favorite VPS in the cloud or deploy it to a pre-configured system in a box like Umbrel Home, hack0, Lightning in a Box or Nodl.it. This gives you the ultimate control over everything, but is more technical to setup and manage.
If you aren’t super nerdy or don’t want to deal with the technical issues, you can also have a third party company host and manage it for you such as the LunaNode Web Deployment. This will cost you more over time as you’re paying a third party for their services, but the main draw back is that you’re not only sacrificing a lot of privacy and security, but can now be de=platformed if that third party doesn’t like you for whatever reason.
BTCPay Server recommends that users avoid self deploying the Docker image to your own hardware, as you need to really understand what you’re doing both with Internet facing server infrastructure and Bitcoin wallets. If you don’t, it can either crash and burn or worse, result in the loss of funds via hacking or just misconfiguration.
Self deployment on your own hardware however is great in a test environment or just for fun at home to get to know what its capabilities are and gain experience. As such, this is what we’ll be covering today, how to setup a simple BTCPay Server and start accepting both Bitcoin and Lightning payments.
Things You’ll Need

The recommended way to deploy BTCPay Server is, as stated above, via their Docker image. As such, you’ll need a VPS platform or your own hardware that can run Docker images on it. For our demo we’ll be using an Umbrel node as it’s not only an excellent OS to use, but makes deploying BTCPay Server a literal one-click affair. You can also use other node in a box solutions or even your own computer, server or Raspberry Pi.
>> Deep Dive: How To Build A Sexy Umbrel Node For $300
Along with having an Umbrel setup and ready to go, you’ll also need to install their Bitcoin and Lightning Node apps. The Bitcoin app will run a full version of the Bitcoin Core software and download a full copy of the Bitcoin Blockchain.
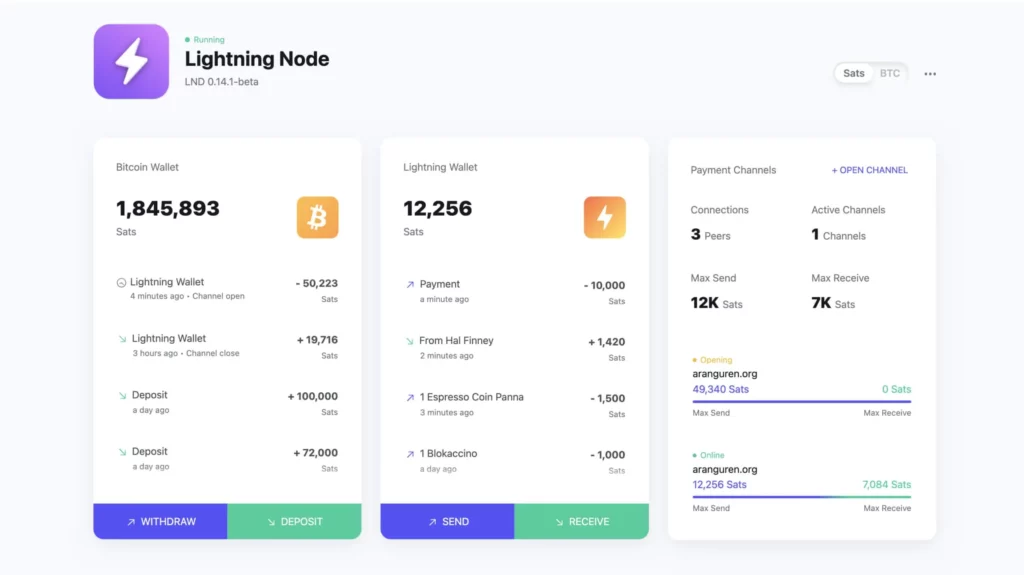
Once your Bitcoin Full Node is setup and fully synced, the Lightning Node app will then run your own LND Lightning Network node on top of this. You will also need to setup a few Lightning Channels to some other well connected peers.
After this is setup you should be able to send and receive both on-chain Bitcoin payments as well as Layer 2 Lightning network payments to and from your own wallets via the Lightning Node app. At this point you’re ready to start installing BTCPay Server!
How To Setup BTCPay Server
Step 1: Install The BTCPay Server App
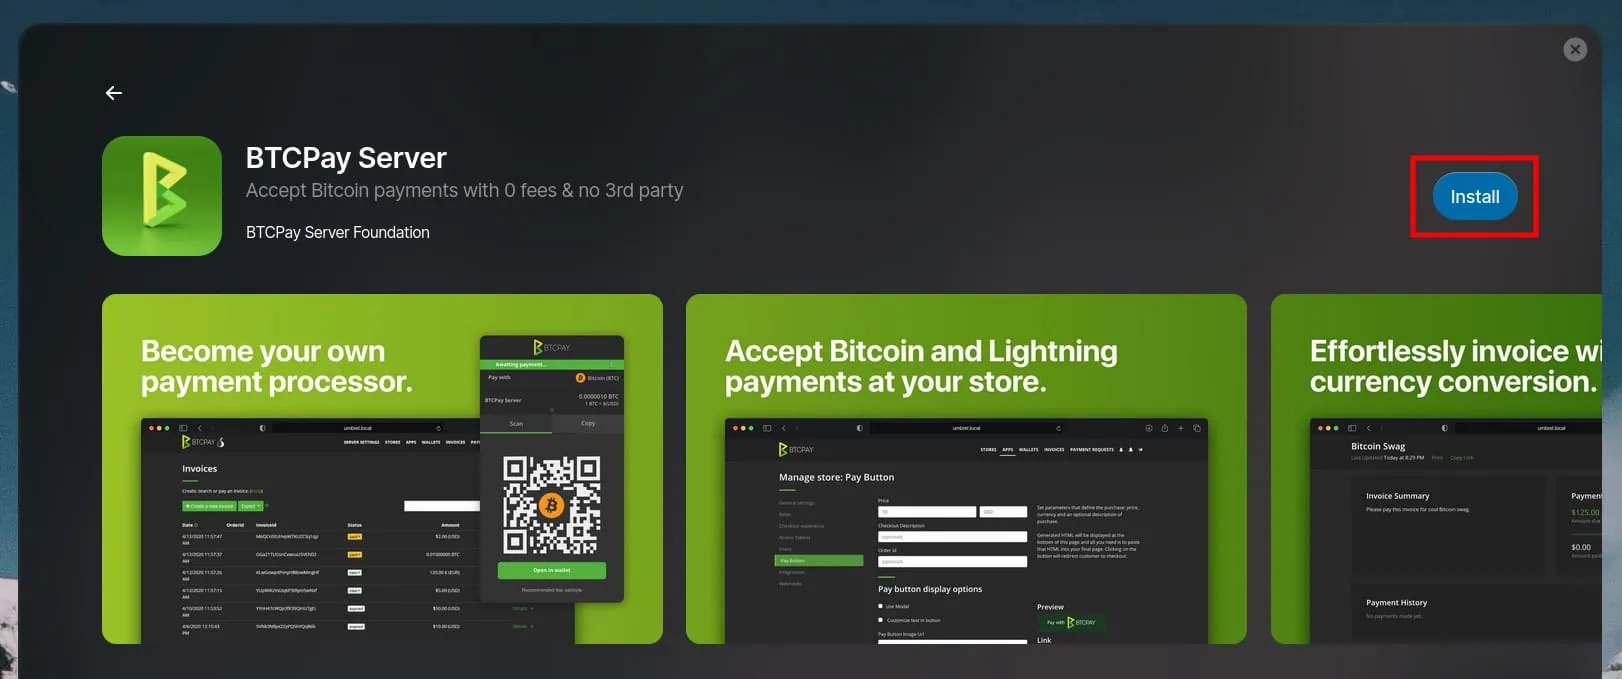
On your Umbrel node, go to the App store and install their BTCPay Server app. Once installed, click on the app icon to open it in a new tab.
Step 2: Create Your Account
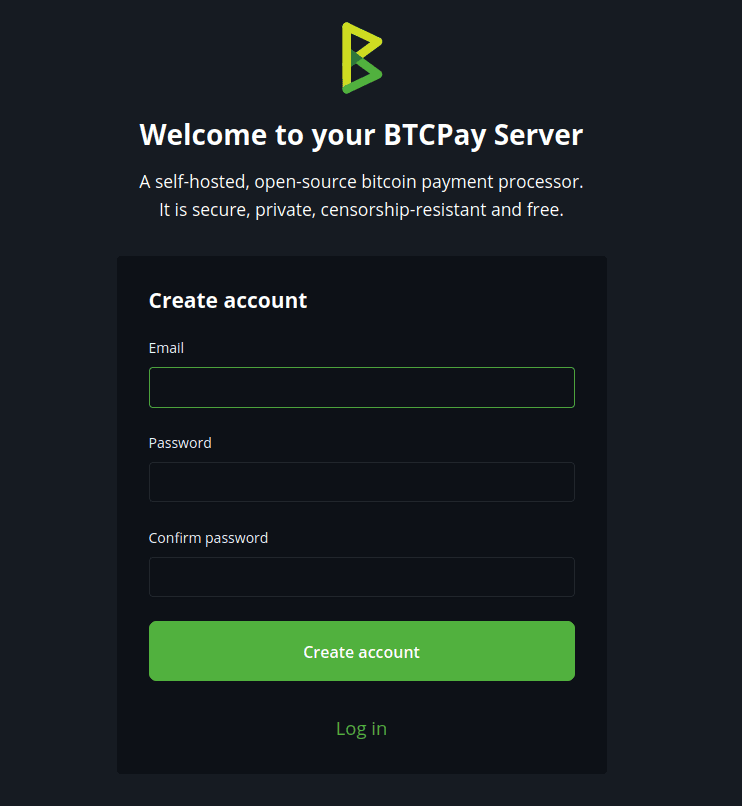
In the new tab you should be welcomed by the Create Account screen, enter in your account email and password. Make sure you use a long (25+ characteres), random and unique password!
Step 3: Create Your Store
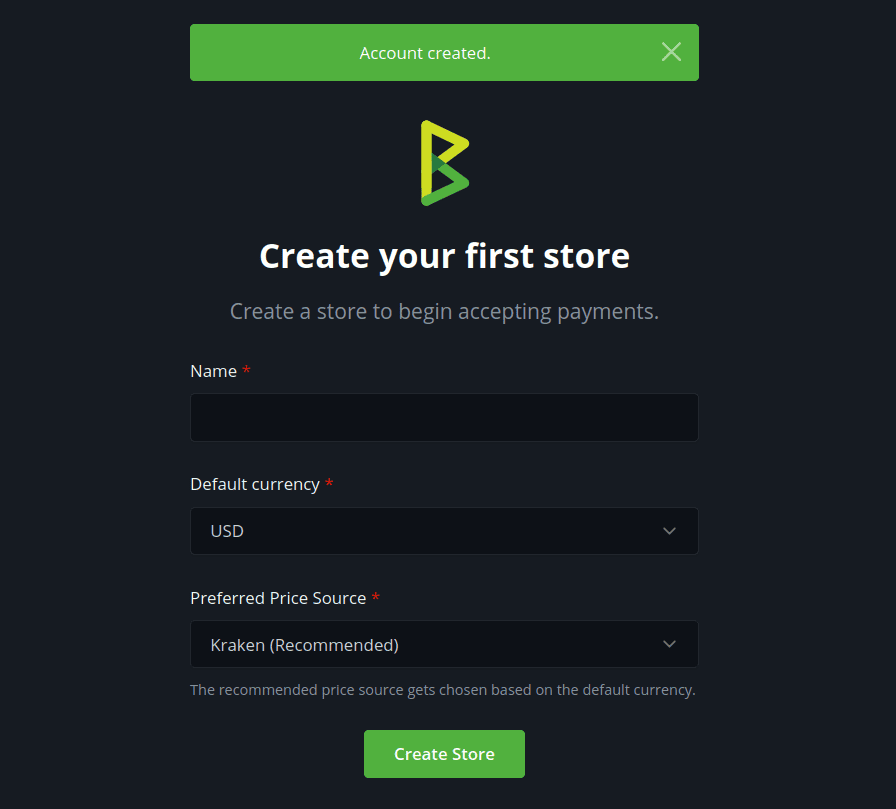
On the next screen you’ll be able to setup your new store. Give it a name and select your default currency, then click Create Store.
Step 4: Setup Your BTCPay Server Bitcoin Wallet
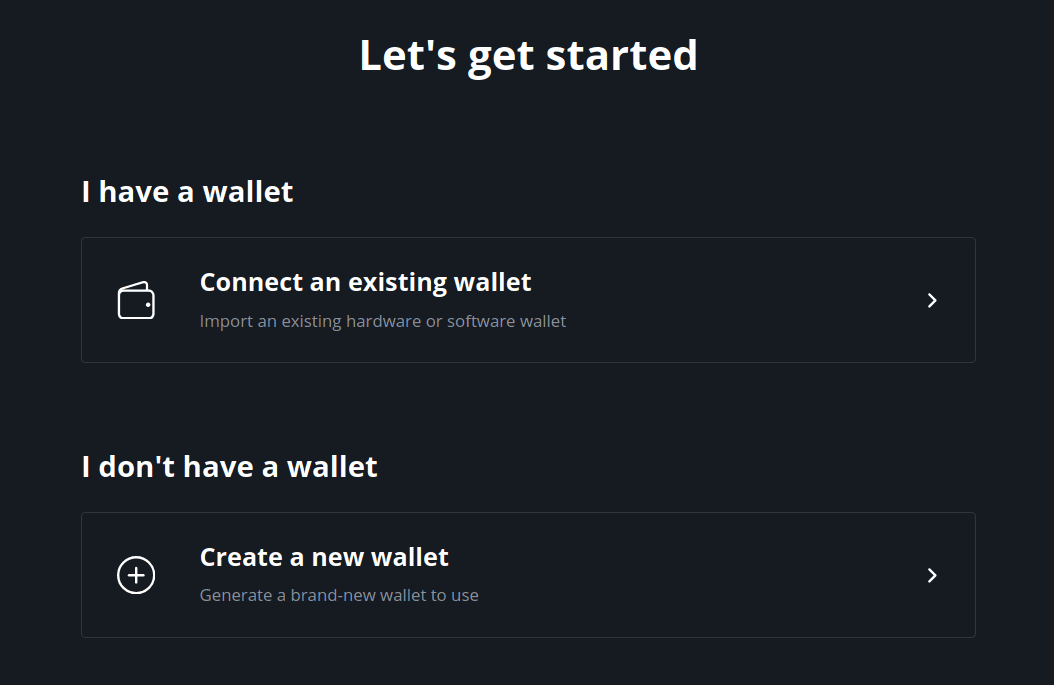
In order to receive payments your BTCPay Server needs a wallet. You can either connect to an existing wallet or create a brand new one. It’s recommended to connect a Hardware Wallet as this provides the best protection for any funds that are managed by your BTCPay Server. Choose which wallet you’d like and follow the setup wizard.
Step 5: Setup Your BTCPay Server Lightning Wallet
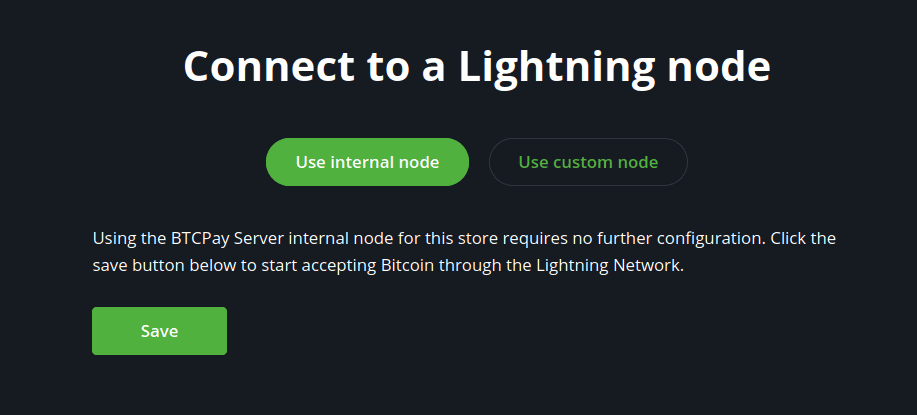
On the side menu under Wallets, click on Lightning. With the Use Internal Node option selected, click Save. A “BTC Lightning node updated” message should appear and if you click on the Public Node Info button you should see a new window popup confirming that your node is connected and Online.
Step 6: Setup Two-Factor Authentication
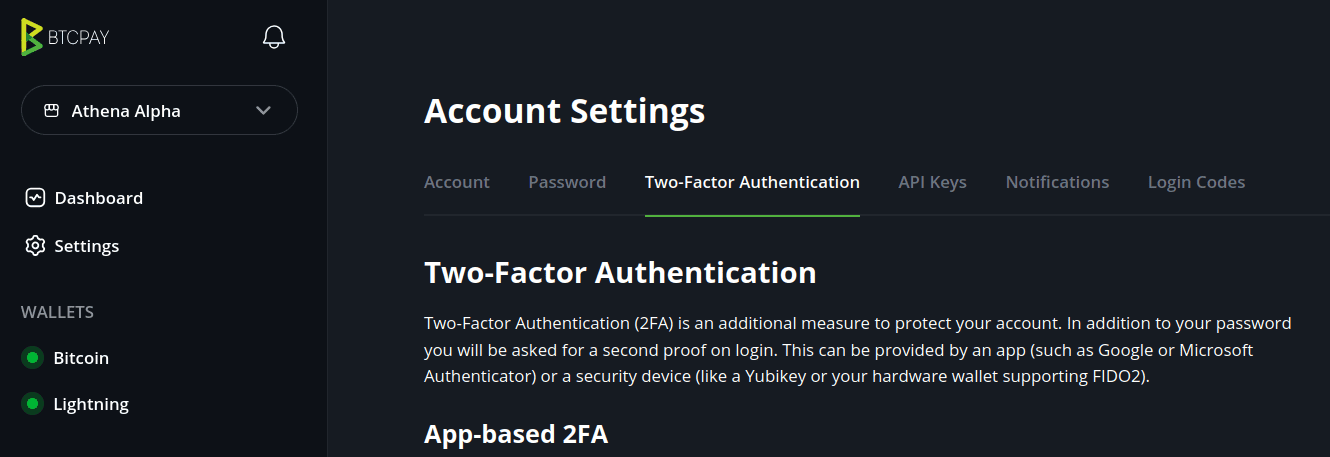
Finally in the bottom left hand corner, at the bottom of the side panel navigate to Account -> Manage Account and under Account Settings click on the Two-Factor Authentication tab. Proceed through the 2FA setup wizard to ensure that your new admin account is fully secured via App based multi-factor authentication and save your recovery codes.
At this point, your BTCPay Server is up and running, is secure and can receive both Bitcoin and Lightning payments, congratulations!
Further Configuration
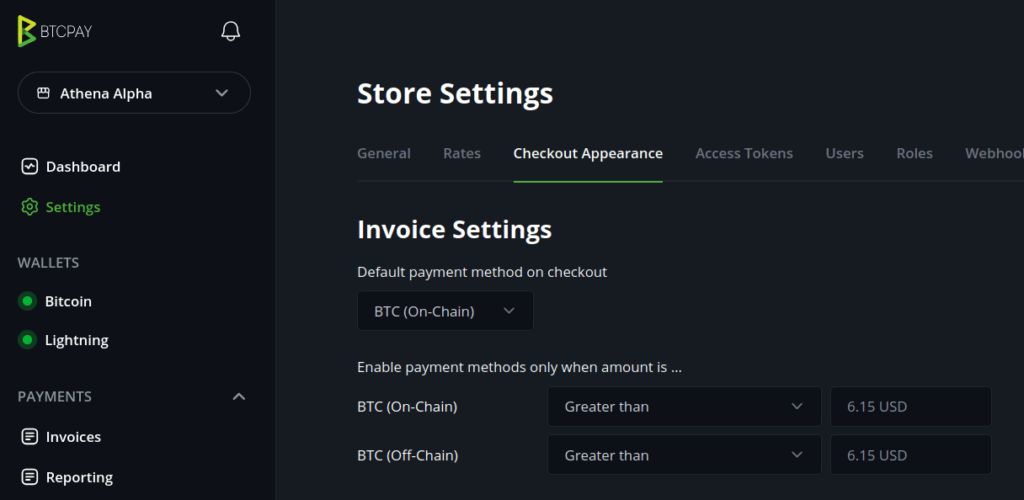
While you’ve now setup your own BTCPay Server, it’s good to note that there are a bunch more settings to configure which are in a few different Settings areas including:
- Server Settings (Bottom Left): These apply to the entire BTCPay Server and include things like DNS or email settings. You might have 10 stores on your server, these settings apply to all of them
- Store Settings (Top Left): These apply to the specified store only and include things like checkout appearance, rates, web hooks or branding
- Account Settings (Bottom Left Under Account): These apply to the logged in user only and include things like username, password, 2FA or notifications
Once you click around for a bit it 100% makes sense, but can be a bit strange seeing multiple “Settings” buttons everywhere. Just know that BTCPay Server can support multiple Stores, each with their own custom settings as well as multiple users too.
From here you can configure a bunch of settings such as what your checkout appearance looks like by clicking the Store Settings button at the top of the side menu then the Checkout Appearance tab.
In the Store Settings area you can also update your Store Name, Store Website, set branding colors, Logo and more. Under the Rates tab you can set your preferred price source, trading pars while under the Users and Roles tabs you can create more users and set their permissions if you have other employees that will need access.
Invoice Management
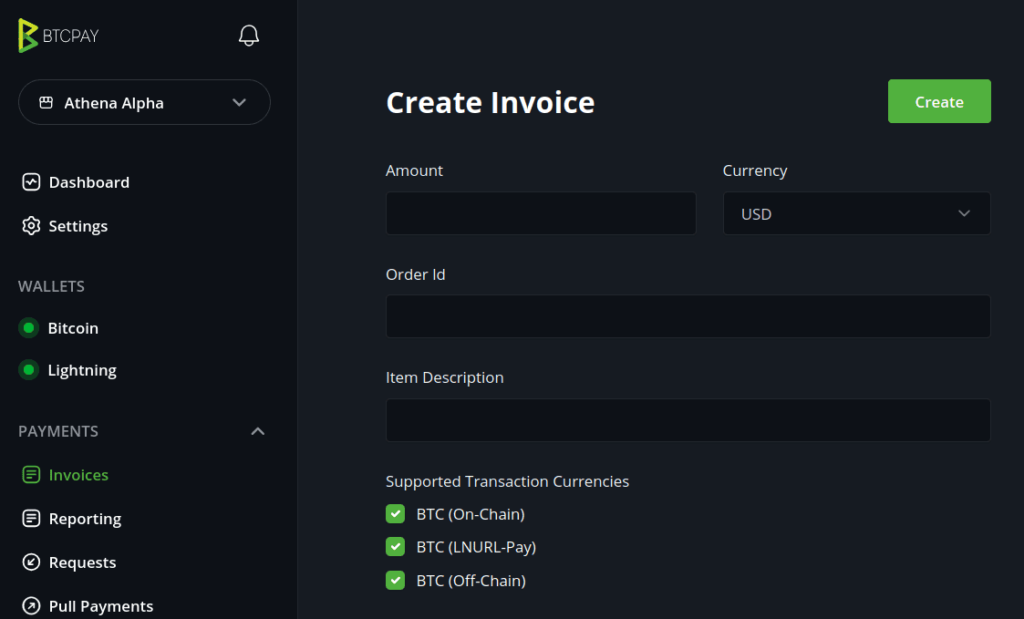
Core to most businesses is creating invoices, so to demonstrate just how easy this is on the left hand panel go to Payments -> Invoices and click Create Invoice in the top right hand corner. This will show you the invoice creation form as shown above where you can assign it an Amount, Order ID, Description and more.
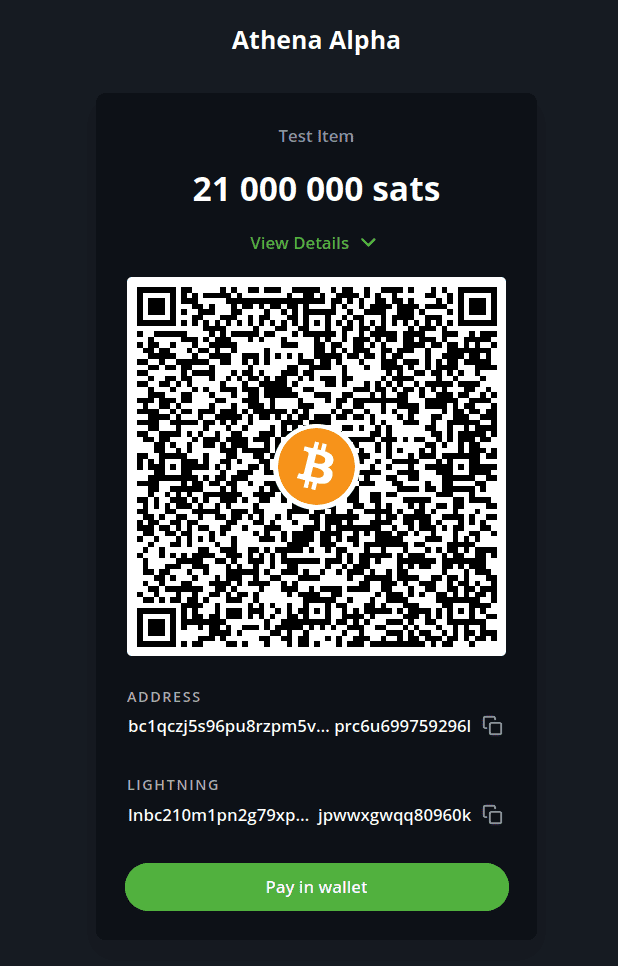
Click Create and BTCPay Server will generate the specified invoice, payable either via on-chain (bitcoin) or off-chain (lightning). Click on the Checkout button and you’ll see a page you can send to your customer for them to pay it. You can also go back to the main Invoices area and see all settled, processing, expired or invalid invoices.
BTCPay Server Plugins & Apps!
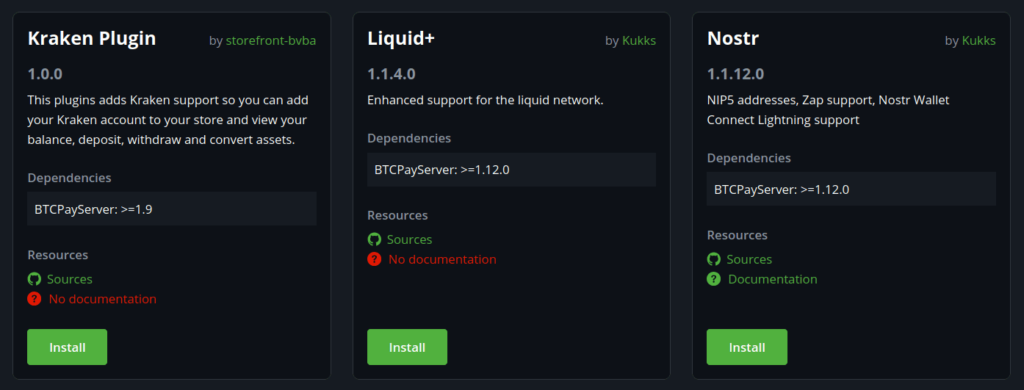
Manually creating customer invoices, while useful, isn’t how most businesses operate especially online. BTCPay Server can of course also automatically create these types of invoices on the fly using the various plugin or Apps that are included with the software. Some of the main ones include:
- Point of Sale (PoS): A web based PoS app to allow businesses with brick and mortar stores to easily ring up their products and accept bitcoin without fees or a third party, peer-to-peer. This app can be easily displayed on mobiles or tablets in the store for quick, easy access and allows you to setup products for each store, amounts, pictures and more
- Crowdfunding: Create a fully self hosted funding campaign just like Kickstarter that you own and control. Pay zero fees and ensure you can never again be de-platformed while increasing security and privacy for both you and your funders
- Payment Button: A simple payment button you can create and customize for placement on public facing websites to receive quick and easy donations or payments in any currency or amount
- E-Commerce Platform Integration: Easily connect to popular e-commerce platforms such as Shopify, WooCommerce, Magento and more
To access any of these great plugins just look under the Plugins area on the side panel menu. You can also find more detailed information on how to setup and configure each of them on the very well written BTCPay Server docs page.
Security And Best Practices
While BTCPay Server is an absolutely fantastic piece of software that gets better and better each year, it’s important to always remember that the world wide web is a dangerous place. While self hosted services like this allow for amazing capabilities you have to ensure it’s well maintained and protected.
As all the code is free and open source, it means the code base is heavily scrutinized for security holes which is a great start. Also make sure you stay fully up to date with any updates that are released by setting up your email notifications under the admin account notification settings.
BTCPay Server also has built in address reuse protection, so that you’re not just blindly receiving all your payments into the same, single address. You can also hide your server from search engines and as mentioned before, always ensure you have 2FA setup and enabled.
Bitcoin & BTCPay Server
The creation and continued growth of BTCPay Server is hands down one of the best things Bitcoin has to offer. It should be noted that there is no “BTCPay Server Company”, this is an open source project that’s funded solely by contributors and donations.
Since launching it’s developed into a formidable payment processing giant that’s used by thousands of people and companies all around the world. Just like Bitcoin it’s FOSS, it’s decentralized and its purely peer-to-peer with no trusted third parties or middlemen in between charging you fees or stealing all your personal financial information.
With a fantastic community and documentation area we can’t wait to see what they come up with next. If you’ve ever wanted to accept payments from all around the globe, for free, without any third parties, without KYC and in a secure and professional way, look no further. The gold standard has arrived!
FAQ
Is BTCPay Legit?
Yes. While BTCPay is not a company, it is fantastic free and open source software (FOSS) that has been developed since 2017 and is funded by hundreds of people to help provide a free payment processor software for all.
How Does BTCPay Work?
BTCPay is free and open source software that anyone can run either on their own hardware or a cloud hosted provider. Once installed it can create invoices for businesses so that their customers can pay them using bitcoin either on-chain or over the Lightning Network.
Does BTCPay Support Lightning?
Yes. BTCPay Server supports not only Bitcoin on-chain Layer 1 payments, but Layer 2 Lightning Network payments and other networks such as Liquid too.
How To Withdraw Money From BTCPay?
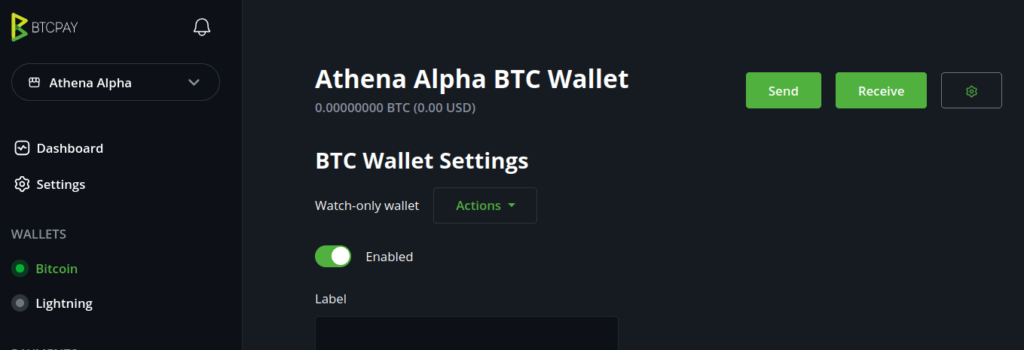
If you have an account with sufficient privileges, simply login to your BTCPay Server and on the side menu go to Wallets -> Bitcoin. From here click the Send button in the top right hand corner and specify your destination address and amount then click Sign Transaction.
Is BitPay Server The Same As BTCPay?
No. BitPay is a company that runs a centralized payment processor service. They can see all your financial information and de-platform you at any time, for any reason they choose. BTCPay Server is a self hosted payment processor system that anyone can self host themselves with zero fees, full control and much higher privacy and security.

